Search this site
These cinematic photographs will transport you to magical scenes of rural Asia

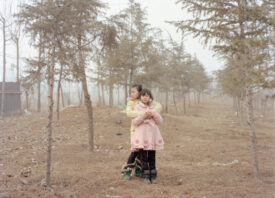
Rarindra Prakarsa captures scenes of rural life in lush, cinematic photographs characterized by dense atmospheres and skillful use of volumetric light.
Although documentary in concept, Prakarsa’s photographs feel meticulously staged, almost like a painting. Combining natural and artificial light sources, ordinary everyday situations like children playing in the water or an old man smoking a pipe look through his lens like these majestic, almost surreal occurrences.
The Jakarta-born artist took up photography as a graphic art major and got his first gigs working as a graphic designer for local newspapers. Converging the two disciplines, Prakarsa’s body of work has always denoted a distinctive knack for composition and a striking use of color.
Prakarsa gave us an insight behind his workflow and shared with us some advice for capturing his trademark cinematic light beams while shooting outdoors.

Where does this obsession for light come from?
The light came from myself. I always love to see morning and afternoon light. Not sure since when I’m so fond of that beautiful light, but I guess it’s since I learned photography when I was still in college.
While I was studying graphic arts, I visited the Netherlands Embassy in Jakarta which was just a few steps from my college, and it turned out there was a painting exhibition.
The pictures were so beautiful to me and very unique in terms of lighting. All the paintings were about Indonesia (especially Bali) but made by a non-Indonesian painter. That’s when I found the painter’s name: Walter Spies. A German painter who lived in Indonesia from 1930 to 1940.
That work really changed my view on lighting and how I see the scenery of Indonesia. The other thing that really changed how I see light is the film The Last Emperor by Bernardo Bertolucci. It shows really beautiful light, especially indoor light.
How do you achieve that “studio feel” in your work?
I use a ‘common’ gear. Nothing special. A Canon 5d Mark III and Sony A7 with some lenses from wide-angle to telephoto and some speedlights and few diffusers.
You’re famous for embracing Photoshop as an essential part of your workflow. When do you know you’ve gone too far with your post-processing?
I’d say Photoshop isn’t that essential for me. Lighting is far more essential. There are many people (usually students/participants) who think Photoshop is essential to create such a feeling. But they’re always surprised when looking at my raw files or taking a peek at my camera’s LCD.
I won’t deny that Photoshop is important to make a correction, dramatize and change colours/tones. But unfortunately, Photoshop is not able to change the direction of light 🙂
How do you place yourself in respect to the sun?
The key is to place yourself diagonally, perhaps at 45 degrees, whether behind or in front of the sun. It really creates more dimension to subject. The next thing to have in mind is the quality and the quantity of sunlight we wish to hit the subject with.
Can you give us some tips to create such stunning atmospheres? Do you use haze machines or anything of the sort?
Morning and afternoon light are always good to create more stunning/dramatic images. Especially a few minutes after the sun rises and before the sun sets.
Always have your artificial lights ready whether you will use them or not. Somehow, 70% of my pictures now apply artificial lights.
A haze machine (fog machine) or any smoke/dust from nature can make your subject stand out more. You lose some detail in the background, but it creates that “fairy look” in your pictures.
What can a student expect from your workshops? Have you thought about expanding them to online classes?
I expect my students to get more understanding of how photography is part of art. That’s the basic mentality. Hence they need to enrich their sense of art. That idea is everything.
What I usually teach (and what they want) are only about two things: Lighting and post-processing. Some additional themes are composition & posing.
I was thinking about an online class. However, I understand people spend more money on off-line classes, so it’s tricky. I started doing private skype classes recently.
What I’ve seen is that most people want to combine photography studies with traveling. So they learn and experience at the same time. That’s why many students come to learn and request trip+workshops.
What are some quick tips that anyone can apply, regardless of the camera they’re using, to improve their profile pic on social media?
A small LED, small speedlights or a small reflector can really make pictures quite different.
You can find information about Rarindra Prakarsa’s workshops and Skype courses at his website, or send him a question on his Facebook Page and Instagram.


